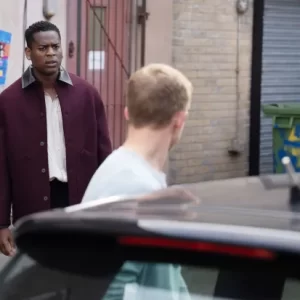
The cobbles are quaking once more, as Coronation Street spirals into a whirlwind of betrayal, stolen money, and a ruthless queen fighting to reclaim what’s hers. Carla Connor, the steely boss of Underworld, finds herself once again at the center of a web of lies—but this time, she’s not backing down.
It all began with the twisted aftermath of serial killer Stephen Reid’s crimes. Among his many deceptions, Stephen swindled a substantial sum from Carla’s business account—money that was meant for the beating heart of Weatherfield’s iconic Underworld factory. But the stolen funds didn’t vanish without a trace. Instead, they fell into the hands of two familiar faces: Jenny Connor and Daisy Midgeley.

The duo, desperate to save the Rovers Return from being sold out from under them, seized the opportunity after Daisy uncovered Stephen’s journal. Dumped by Audrey Roberts, the journal contained crucial clues—including the password to the hidden bank account Stephen had used to stash Carla’s money. Daisy cracked the code, and just like that, Carla’s stolen fortune was theirs for the taking.
Panicked but determined, Daisy convinced Jenny to use the money to buy back the Rovers. In hushed tones and whispered promises, they vowed they would pay Carla back “every penny.” They even spun a convenient tale, claiming Daisy’s mother Christina had gifted them the funds after a failed loan application.
But the lie was as fragile as it was wicked. It didn’t take long for the cracks to appear. Christina nearly let the truth slip—only to double down and keep the ruse alive, flexing her maternal dominance over Daisy in the process. Still, the truth couldn’t stay buried forever. Thanks to Bethany Platt’s snooping, the real story came to light. And Carla? She wasn’t going to be fooled twice.
Having waited patiently, Carla made it clear she was done waiting. The time for diplomacy had passed. With her stepdaughter Betsy Swain now in need of funds—money Carla had previously earmarked for the transplant that saved Betsy’s life—Carla delivered an ultimatum: the pub must be sold so she can recoup her stolen funds.
Jenny was stunned. The pub that had been her home, her identity, was now a bargaining chip. She relayed Carla’s devastating demand to Daisy—who was already reeling from her own discovery. Jenny had secretly planned to buy the Rovers for herself using investment money that Daisy’s father had set aside years ago. A betrayal wrapped in another betrayal.
Now, in a twist that even Carla couldn’t have foreseen, Daisy has teamed up with her manipulative mother, Christina, to secure the cash. Their plan? To scam Jenny with the help of “Dom,” Christina’s shady accomplice posing as a slick businessman. He promised Jenny a windfall if she invested quickly—but behind closed doors, Dom and Christina were planning to split the money and leave Daisy with nothing.
Wednesday night’s episode pulled back the curtain on their scheme—and fans were livid. Carla, once again, was the collateral damage. Dom had the audacity to scoff that Carla was “loaded,” suggesting she didn’t need the money. But viewers weren’t having it.
“She’s not loaded—it’s her business’s money!” one fan raged. Another demanded justice, declaring, “Leave Carla alone!” Across social media, Corrie loyalists called for a reckoning. Karma, they said, had better be on Carla’s side.
And if Corrie has taught us anything over the decades, it’s that Carla Connor never stays down for long. This is a woman forged in fire, who has clawed her way back from breakdowns, betrayals, and boardroom battles. If Jenny, Daisy, and Christina think they can pull one over on Carla, they’re in for a rude awakening.
With the Rovers on the chopping block and loyalty in short supply, the stage is set for a dramatic fallout. Carla isn’t just demanding her money back—she’s reclaiming her power. And if Weatherfield’s most formidable businesswoman has to bring down the pub brick by brick to do it, so be it.